Do you have more than one API that you share with your customers or your team? Or, multiple versions of one API? If you do have many different API specifications, it can be difficult to organize and share your documentation in a coherent way. This is why Bump developed hubs.
What is a hub?
A hub is a group of API documents. This way you can organize and share your various specifications (be it multiple endpoints, versions, or just a way to organize many microservice APIs). The hub page is a root listing of all of your APIs, and you can organize your documentation inside the hub in any way you wish.
Let’s see how it works in action.
Creating a hub
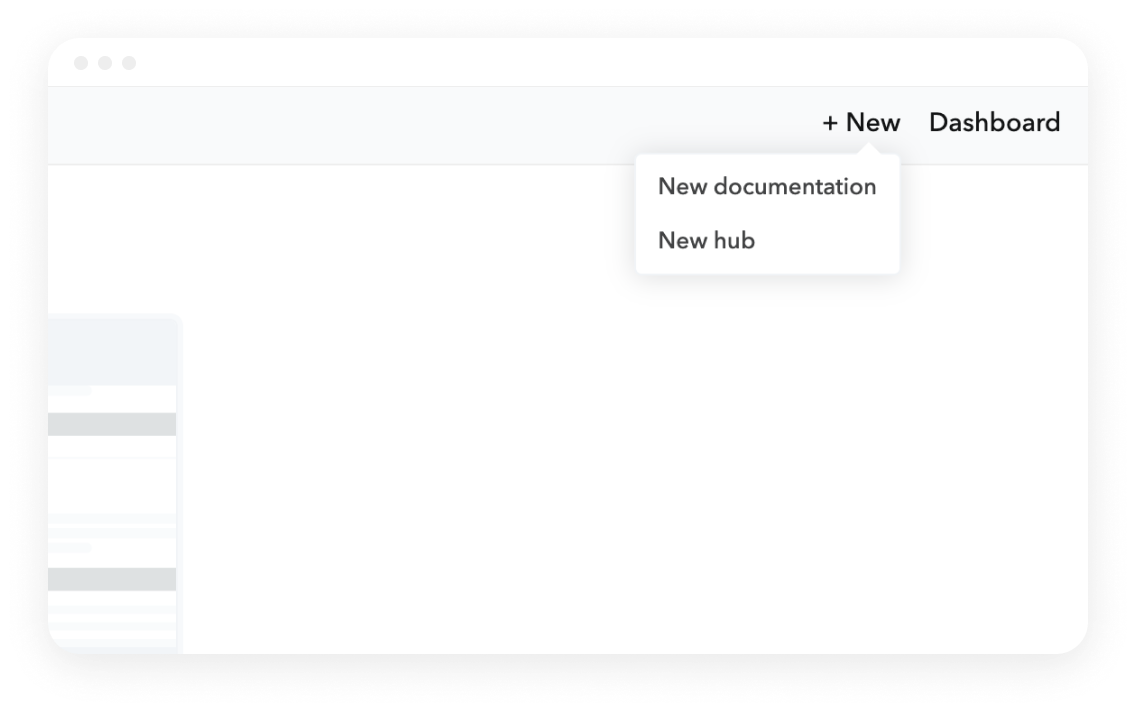
To begin organizing your API docs, you’ll need to create a hub. In your Bump Dashboard, click “+New” at the top, and choose “New hub”
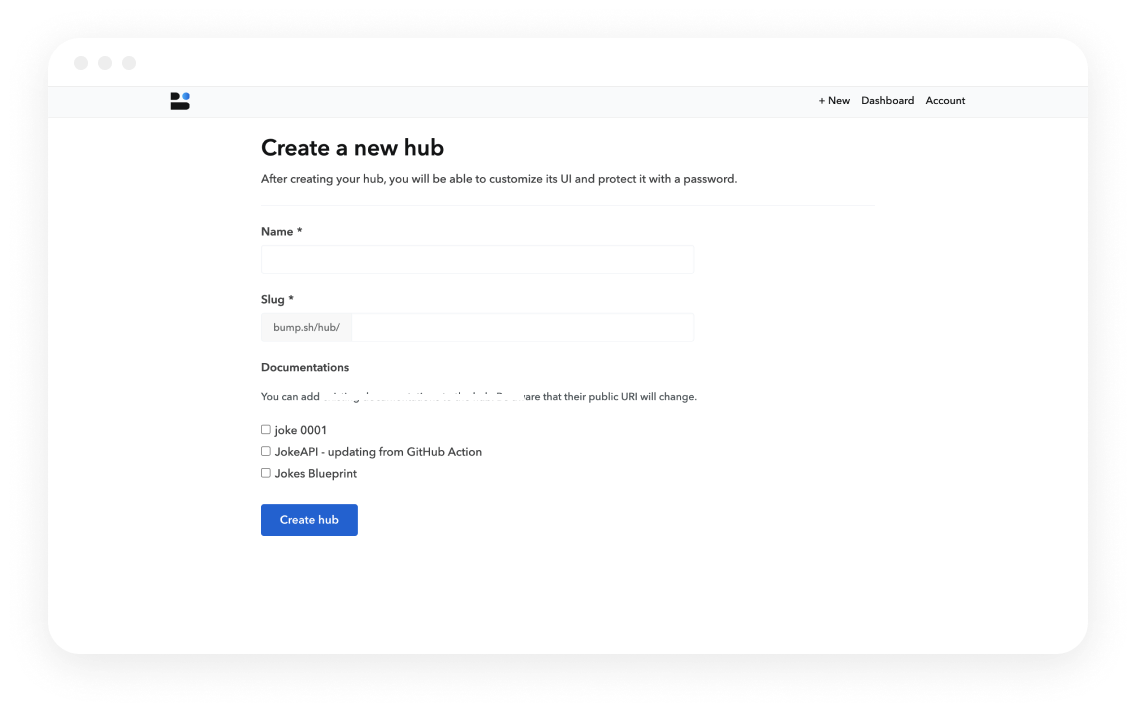
This will open a page to create your new hub, where you supply a name, and if you already have standalone APIs in Bump, you can choose to add them to the hub:
I would like to organize my various JokeAPI documents using a hub. At the time of this blog post, I have 3 versions of my API:
- Joke Blueprint: OpenAPI specification that I am using to define my API.
- Joke 001: The initial commit - with just the admin upload endpoint added.
- JokeAPI - updating from GitHub Action: When changes are made in GitHub, this documentation is updated automatically. This is the “current” API document.
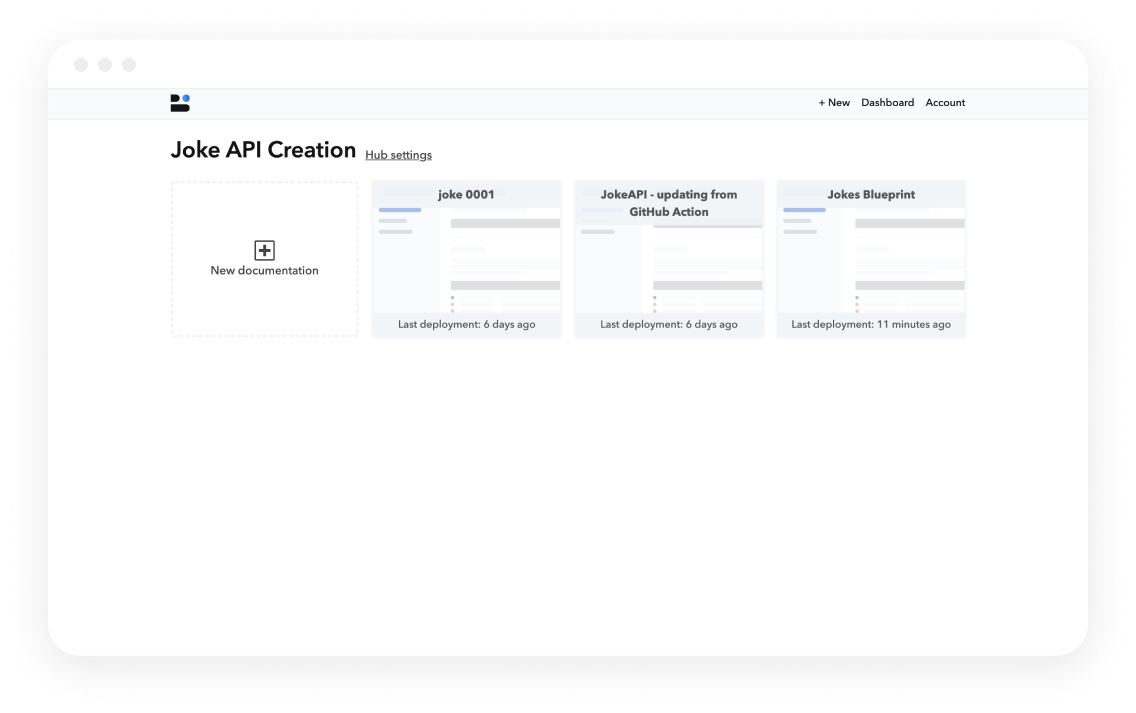
I named my hub “Joke API Creation”. Once created, I was taken to my dashboard. I added each document from my dashboard, using the “New documentation” button and adding each API document sequentially. Here is a screen shot after all 3 documents were added:
Looking at my APIs
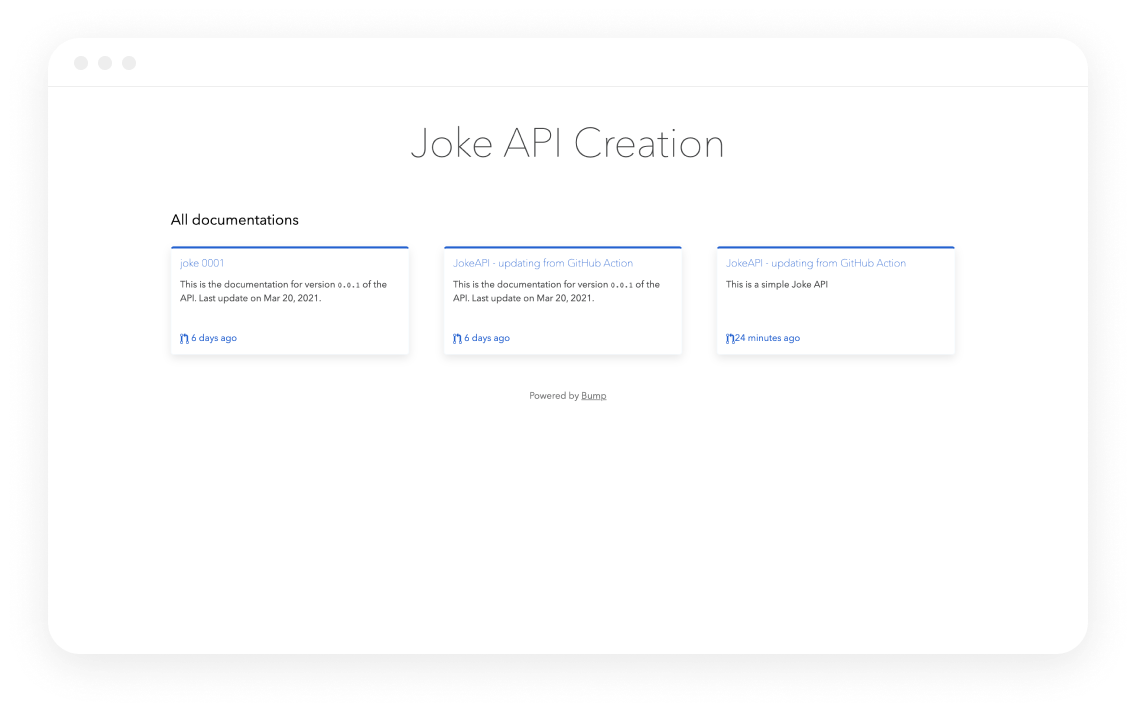
When you first create your hub, all the documentation is grouped together (in the “all documentation” category). Perhaps that is all you need - now your users can easily navigate between the different documentation, and they are all in one convenient place.
hub Categories
In my case, one Document is my blueprint, and another is my initial commit - neither are really meant to be used. I’d like to mark those in such a way to denote that they are not the active API, but are present for historical reasons.
I can use the hub category feature to do this. You can see this in action with the Bump demo hub where there are 4 categories:
- Last deployments
- Public
- Services
- Tools & external APIs
To group by categories, enter your hub settings, and change the Customize UI:
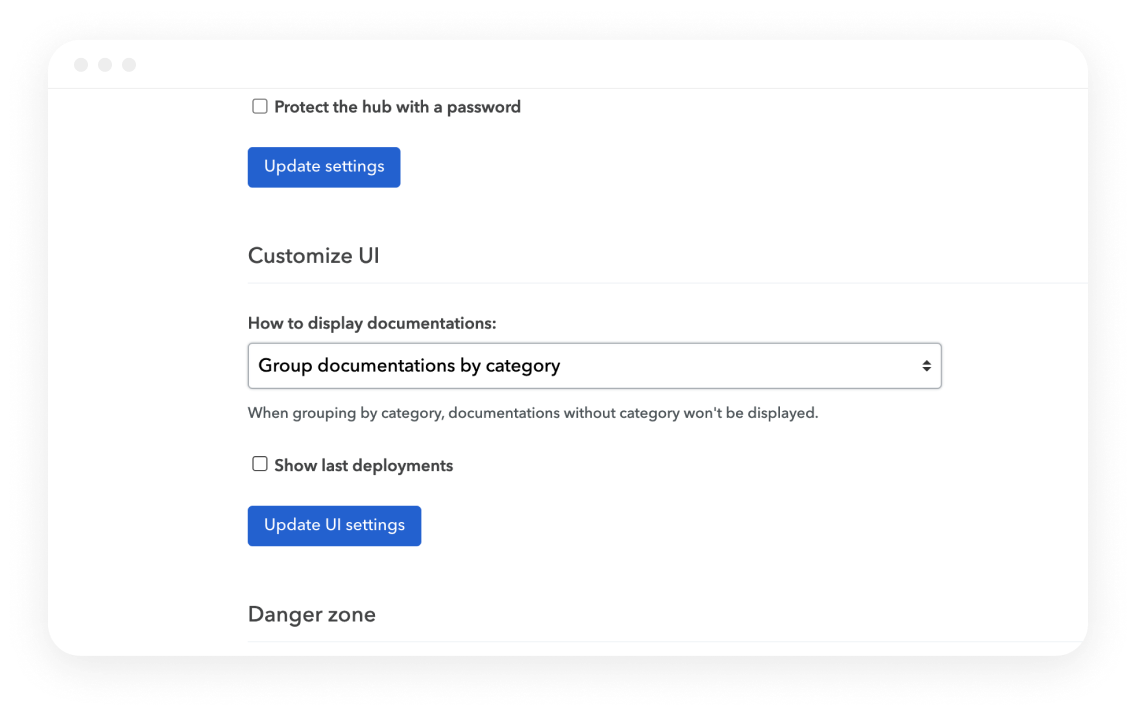
Click the “Update UI Settings” button to save this parameter.
Next, you must tag each API with a category. In your hub settings, go to “documentation” where you will find each API in your hub.
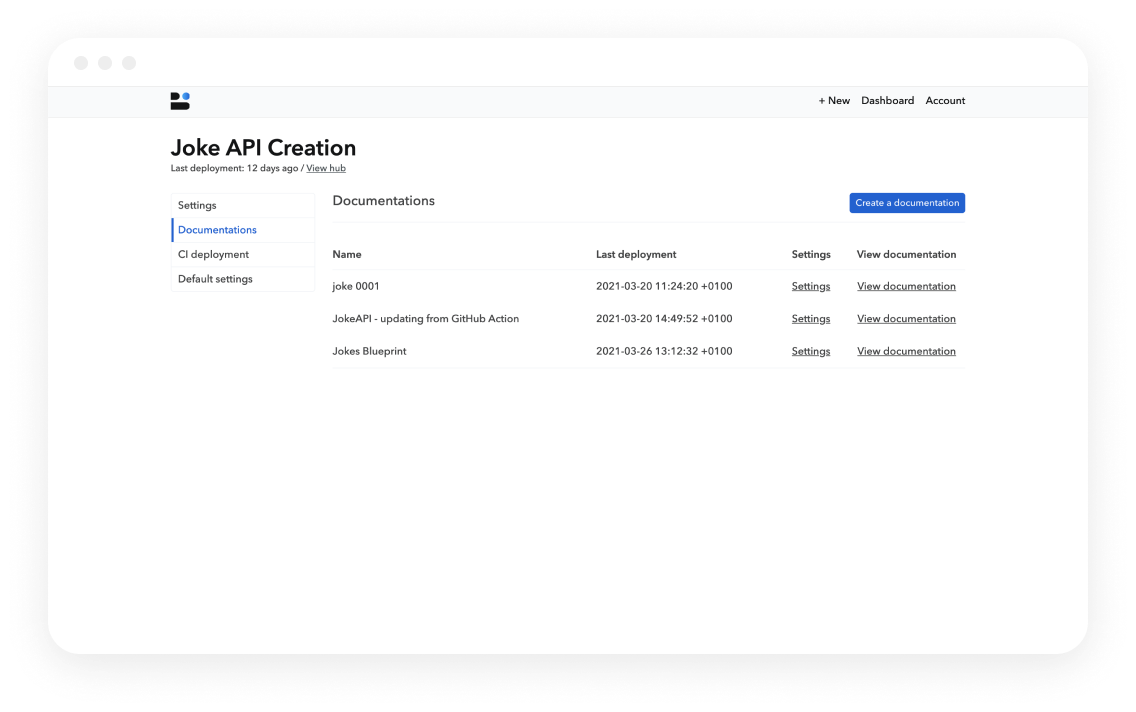
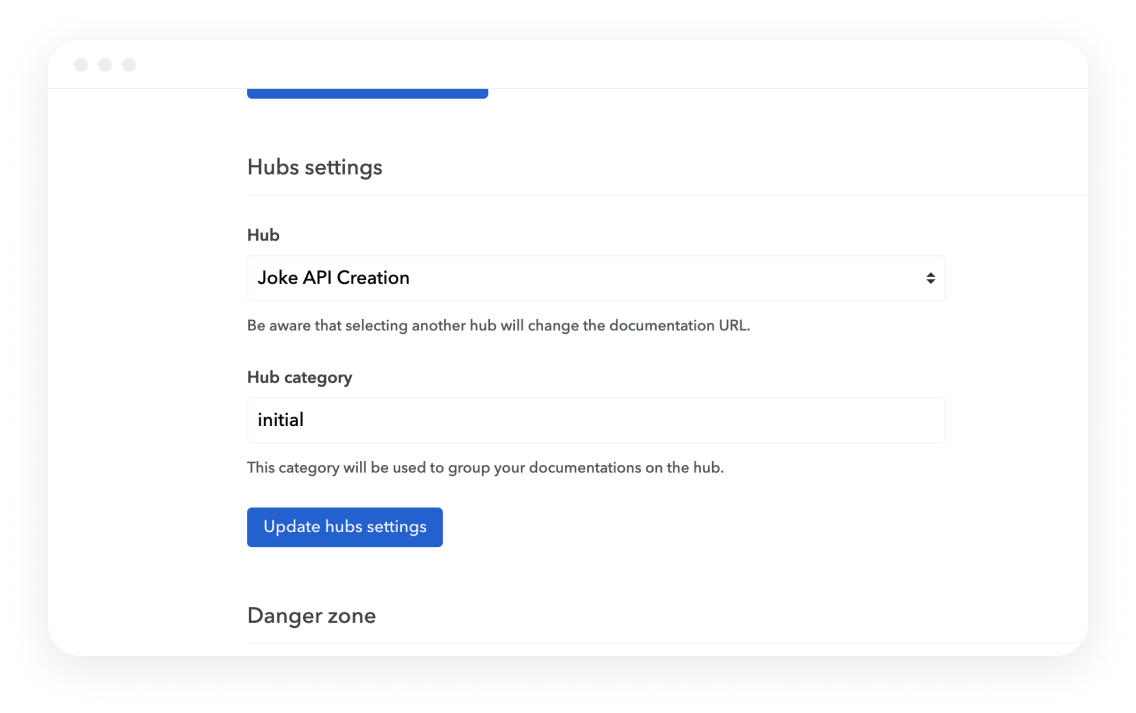
In the Settings for each Documentation, you’ll see a “Hubs settings” section. Here you can assign the documentation to a hub, and add a category. For my Joke 0001 documentation, I would like to categorize as “initial”:
Complete this for each API, and now your hub will appear with each API listed by category:
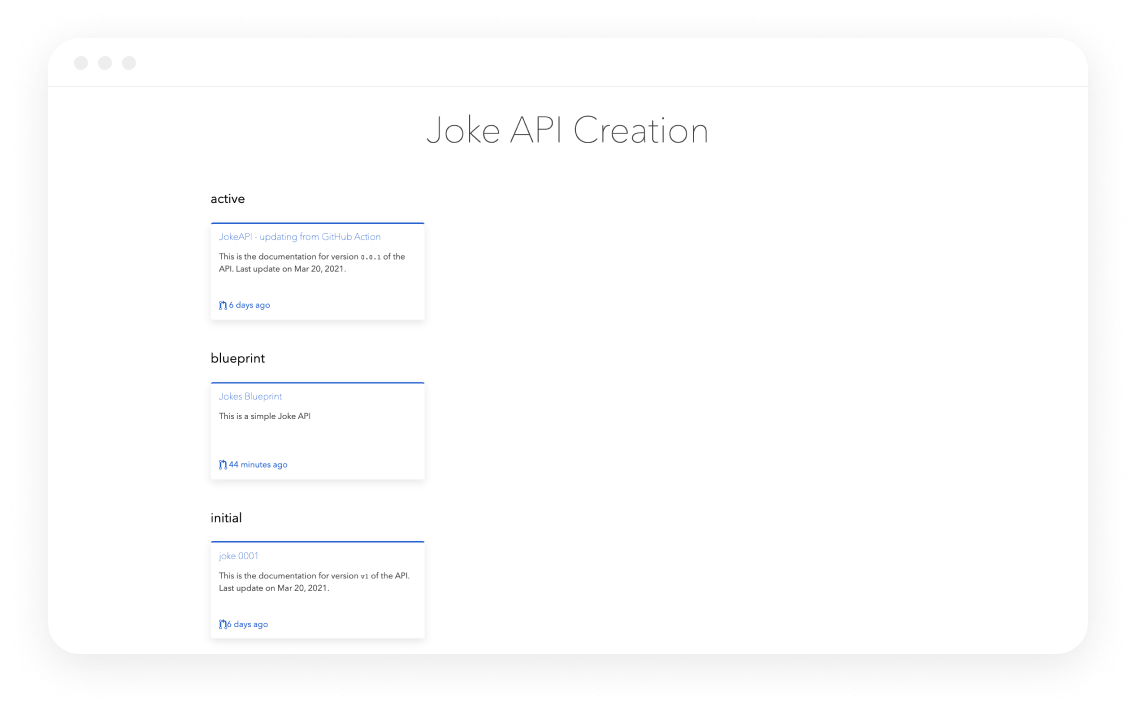
The categories are listed in alphabetical order, so it is convenient that the “active” API appears first.
Now, anyone visiting my hub can see the evolution of the JokeAPI documentation, from Blueprint to the initial API commit, to the active API documentation. The number of documentation will increase as the API continues to be built, but they will always have a nice organization to them thanks to the hub interface.